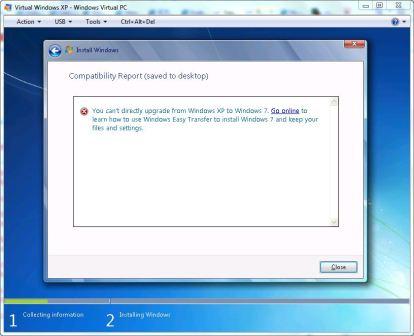
You can't directly upgrade from Windows XP to Windows 7. Anda tidak dapat langsung melakukan upgrade dari Windows XP ke Windows 7. Go online to learn how to use Windows Easy Transfer to install Windows 7 and keep your files and settings. Online untuk mempelajari cara menggunakan Windows Easy Transfer untuk menginstal Windows 7 dan menyimpan file Anda dan pengaturan.
Windows XP users, who can purchase a Pengguna Windows XP, yang dapat membeli Windows 7 Upgrade license Windows 7 Upgrade lisensi and disc media, is required to perform clean installation Windows 7, which the Windows 7 setup wizard otherwise known as custom installation that requires overwriting of installing partition. disk dan media, diperlukan untuk melakukan instalasi Windows 7 bersih, yang Windows 7 setup wizard atau dikenal sebagai adat yang memerlukan instalasi Timpa instalasi dari partisi. The overwriting will wipe off entire data stored on the hard disk volume or partition, especially when user opt to format the disk during setup. Timpa yang tidak akan menghapus seluruh data yang tersimpan pada harddisk volume atau partisi, terutama ketika pengguna memilih untuk memformat disk pada saat setup.
Although there is Walaupun terdapat workaround to in-place upgrade Windows XP to Windows 7 Workaround ke dalam tempat-upgrade Windows XP ke Windows 7 by upgrading to Windows Vista first (which also have added advantage of retaining program files), which supports direct upgrade from Windows XP, Microsoft does oleh upgrade ke Windows Vista pertama (yang juga telah menambahkan mempertahankan keuntungan dari program files), yang mendukung langsung meng-upgrade dari Windows XP, Microsoft tidak recommend menyarankan end-user to use Windows Easy Transfer utility to migrate files and settings from Windows XP to Windows 7 which is fresh installed on same computer, by temporarily storing files on a removable media, such as an external hard drive or UFD, or on a network share. end-user untuk menggunakan Windows Easy Transfer utilitas bermigrasi ke file dan pengaturan dari Windows XP ke Windows 7 yang baru diinstal pada komputer yang sama, dengan menyimpan file sementara pada removable media seperti eksternal harddisk atau UFD, atau pada sebuah jaringan berbagi. Windows Easy Transfer can transfer data from one user's profile, or from multiple user accounts, with flexibility of allowing user to choose what to move to new computer and set which transfer method to use. Windows Easy Transfer dapat mentransfer data dari satu pengguna profil, atau dari beberapa account pengguna, dengan fleksibilitas yang memungkinkan pengguna untuk memilih apa yang harus pindah ke komputer baru dan menetapkan metode transfer yang digunakan.
However, do note that Windows Easy Transfer cannot move program files. Namun, tidak diketahui bahwa Windows Easy Transfer tidak dapat memindahkan file program. Windows Easy Transfer can move only data and program settings, and thus end-user must install back software programs on then newly-installed Windows 7 computer. Windows Easy Transfer hanya dapat memindahkan data dan program pengaturan, sehingga pengguna akhir harus menginstal kembali perangkat lunak program baru di kemudian diinstal Windows 7 komputer. Other than applications and programs, Windows Easy Transfer also does not transfer any system files such as fonts and drivers, and end-user must install back custom fonts and updated drivers again in Windows 7. Selain aplikasi dan program, Windows Easy Transfer juga tidak ada sistem transfer file seperti font dan driver, dan pengguna akhir harus menginstal kembali font kustom dan diperbarui lagi driver dalam Windows 7. However, when the transfer is done, Windows Easy Transfer Reports will display what was transferred and provide a list of programs you might want to install on new computer, as well as links to other programs user might want to download. Namun, ketika transfer selesai, Windows Easy Transfer Laporan akan menampilkan apa yang ditransfer dan menyediakan daftar program yang mungkin akan dipasang di komputer baru, serta link ke program lain pengguna mungkin ingin men-download.
Here's the illustrative guide on how to upgrade Windows XP to Windows 7 using Windows Easy Transfer (WET). Here's the ilustrasi buku petunjuk tentang cara untuk meng-upgrade Windows XP ke Windows 7 menggunakan Windows Easy Transfer (WET). Once upgraded to Windows 7, all old Windows XP files will be stored under Windows.old directory. Setelah upgrade ke Windows 7, Windows XP lama semua file akan disimpan di bawah direktori Windows.old. The guide assumes that you already have a Windows 7 DVD on hand. Panduan menganggap bahwa Anda sudah memiliki Windows 7 DVD di tangan. Else, Lain, download the Window 7 RTM DVD ISO download Window 7 RTM DVD ISO (most Windows XP user requires 32-bit (x86) Windows 7 DVD ISO image). (kebanyakan pengguna Windows XP memerlukan 32-bit (x86) Windows 7 DVD ISO image).
- Insert the Windows 7 DVD while running Windows XP. Masukkan DVD Windows 7 ketika menjalankan Windows XP. If the Windows 7 installation window opens automatically, close it. Jika Windows 7 instalasi jendela akan dibuka secara otomatis, menutupnya. Alternatively, mount the Windows 7 ISO on a virtual drive, or extract the content to local disk. Atau, mount Windows 7 ISO pada virtual drive, atau ekstrak konten ke disk lokal.
- Open Windows Explorer from Start menu -> Accessories . Buka Windows Explorer dari menu Start -> Accessories.
- Browse to the DVD drive of the computer and double click on migsetup.exe in the Support\Migwiz directory to run the Windows Easy Transfer. Browse ke DVD drive di komputer dan klik dua kali pada migsetup.exe di Dukungan \ Migwiz direktori untuk menjalankan Windows Easy Transfer.

- Windows Easy Transfer window opens. Windows Easy Transfer jendela terbuka. Click Next . Klik Next.

- Select An external hard disk or USB flash drive when asked what do you want to use to transfer items to your new computer. Pilih Sebuah harddisk eksternal atau USB flash drive ketika ditanya apa yang akan digunakan untuk mentransfer item ke komputer Anda yang baru.

- Click This is my old computer . Klik Inilah komputer lama. Windows Easy Transfer starts scaning the computer to look for files to transfer. Windows Easy Transfer mulai scaning komputer untuk mencari untuk mentransfer file.

- Once scanning is completed, select which files should be migrated by selecting only the user profiles or shared items that wants to transfer, or by clicking Customize to choose among various options such as Desktop, Favorites, Program Settings, Windows Settings, My Documents, My Videos, My Music, My Pictures, Quick Launch and etc. Click Next when done. Setelah pemindaian selesai, pilih file mana yang harus pindah dengan memilih profil pengguna hanya berbagi atau item yang ingin mentransfer, atau dengan mengklik Customize untuk memilih di antara berbagai pilihan seperti Desktop, Favorit, Program Pengaturan, Pengaturan Windows, My Documents, Saya video, My Music, My Pictures, Quick Launch dan sebagainya Klik Next ketika selesai.

- Enter a password to protect Easy Transfer file, or leave the box blank, and then click Save . Masukkan sandi untuk melindungi Easy Transfer file, atau biarkan kotak kosong, kemudian klik Simpan.

- Browse to the external location on the network or to the removable media to save the Easy Transfer file, and then click Save . Browse ke lokasi di luar jaringan atau ke removable media untuk menyimpan Easy Transfer file, dan kemudian klik Simpan.
- Click Next once files and settings are saved. Klik Next sekali file dan pengaturan yang tersimpan. Windows Easy Transfer displays the file name and location of the Easy Transfer file just created. Windows Easy Transfer menampilkan nama file dan lokasi yang mudah Mentransfer file hanya dibuat.

Click Next and follow by Close to exit. Klik Next dan ikuti oleh Tutup untuk keluar. - Start Windows 7 Setup by browsing to the root folder of the DVD in Windows Explorer, and then double clicking setup.exe . Mulai Setup Windows 7 oleh browsing ke root folder dari DVD pada Windows Explorer, kemudian klik ganda setup.exe.
- Click Install Now . Klik Instal Now.
- Click Go online to get the latest updates (recommended) to retrieve any important updates for Windows 7. Klik Go online untuk mendapatkan update terbaru (dianjurkan) untuk mengambil semua update penting untuk Windows 7. This step is optional. Langkah ini adalah opsional. If you choose not to check for updates during Setup, click Do not get the latest updates . Jika Anda memilih untuk tidak memeriksa pembaruan selama Setup, klik Don't get the latest update.
- Read and accept the Microsoft Software License Terms. Membaca dan menerima Persyaratan Lisensi Microsoft Software. Click the check box for I accept the License Terms (required to use Windows), and then click Next . Klik kotak untuk saya menerima Persyaratan Lisensi (diperlukan untuk menggunakan Windows), dan kemudian klik Next. If you click I decline (cancel installation), Windows 7 Setup will exit. Jika Anda mengklik Saya menolak (membatalkan instalasi), Windows 7 Setup akan keluar.
- Click Custom (advanced) to perform an upgrade to your existing Windows installation. Klik Custom (lanjutan) untuk melakukan upgrade ke Windows instalasi yang ada.

- Select the partition where you would like to install Windows. Pilih partisi di mana Anda ingin menginstal Windows. To move your existing Windows installation into a Windows.old folder and replace the operating system with Windows 7, select the partition where your current Windows installation is located. Anda yang ada untuk memindahkan instalasi Windows ke dalam folder Windows.old dan menggantikannya dengan sistem operasi Windows 7, pilih partisi tempat instalasi Windows Anda saat ini berada. Note: If you choose to install on a partition that is not currently running any Windows OS, your system will become dual-boot system. Catatan: Jika Anda memilih untuk menginstal pada partisi yang tidak sedang berjalan apapun OS Windows, sistem anda akan menjadi dual-boot sistem.
- Click Next and then click OK . Klik Next, dan kemudian klik OK. Windows 7 Setup will proceed without further interaction. Setup Windows 7 akan melanjutkan tanpa interaksi.
- After Windows 7 installation completed and after logging on to Windows 7 desktop, insert the removable media with Easy Transfer files into the computer. Windows 7 setelah instalasi selesai dan setelah log in ke Windows 7 pada desktop, memasukkan removable media dengan Mudah Mentransfer file ke dalam komputer.
- Click Start -> All Programs -> Accessories -> System Tools , and then click Windows Easy Transfer . Klik Start -> All Programs -> Accessories -> System Tools, kemudian klik Windows Easy Transfer.
- The Windows Easy Transfer window opens. Windows Easy Transfer jendela terbuka. Click Next . Klik Next.
- Click An external hard disk or USB flash drive when asked what do you want to use to transfer items to your new computer.. Klik Sebuah harddisk eksternal atau USB flash drive ketika ditanya apa yang akan digunakan untuk mentransfer item ke komputer Anda yang baru ..
- Click This is my new computer . Klik Ini adalah komputer baru.

- Click Yes when asked if Windows Easy Transfer already saved your files from old computer to an external hard disk or USB flash drive. Klik Yes ketika ditanya apakah Windows Easy Transfer sudah tersimpan file Anda dari komputer lama ke harddisk eksternal atau USB flash drive.

- Browse to the location where the Easy Transfer file was saved. Browse ke lokasi tempat Easy Transfer file disimpan. Click the file name, and then click Open . Klik nama file, kemudian klik Buka.
- Choose which files should be migrated by selecting only the user profiles that want to transfer, or by clicking Customize to select categories of data to transfer to new Windows 7 installation. Memilih file mana yang harus pindah dengan memilih hanya profil pengguna yang ingin mentransfer, atau dengan mengklik Customize untuk memilih kategori untuk mentransfer data ke instalasi baru Windows 7. Click Transfer when done to transfer all files and settings. Klik Transfer bila semua dilakukan untuk mentransfer file dan pengaturan.

- Click Close after Windows Easy Transfer has completed moving your files. Klik Tutup Windows Easy Transfer setelah selesai memindahkan file Anda.

- Open Disk Cleanup by clicking on Start -> All Programs -> Accessories -> System Tools -> Disk Cleanup . Buka Disk Cleanup dengan mengklik Start -> All Programs -> Accessories -> System Tools -> Disk Cleanup.
- Click Clean up system files . Klik Bersihkan sistem file. Previous installations of Windows are scanned. Sebelumnya instalasi Windows yang dipindai.
- Select Previous Windows installation(s) and any other categories of files you want to delete. Sebelumnya pilih instalasi Windows (s) dan lain kategori file yang ingin Anda hapus.
- Click OK and then click Delete Files . Klik OK, kemudian klik Delete Files.
Related Articles Artikel Terkait
- Windows Vista Anytime Upgrade – How to Upgrade Edition Guide and Price Windows Vista Anytime Upgrade - Cara Upgrade Edition Panduan dan Harga
- Hack and Workaround to Clean or Fresh Install Windows Vista with Upgrade License DVD Hack dan Workaround atau ke Bersih Fresh Instal Windows Vista dengan DVD Upgrade Lisensi
- Workaround to Direct In-Place Upgrade Windows XP to Windows 7 Workaround langsung ke dalam Tempat Upgrade Windows XP ke Windows 7
- Windows Vista In-Place Upgrade from Windows XP Support Matrix and Options Dalam Windows Vista-Tempat Upgrade dari Windows XP Dukungan Matrix dan Pilihan
- Hack to Upgrade Windows 7 From Beta or Pre-RC to RC (70xx to 71xx) Version Directly Hack Upgrade ke Windows 7 Dari Pra-Beta atau RC ke RC (70xx ke 71xx) Versi langsung
- Transfer Files to Vista File transfer ke Vista
- Windows XP Upgrades to Windows 7 Upgrade Path Possible Upgrade Windows XP ke Windows 7 Upgrade Path Kemungkinan
- Unable to Clean Install Windows Vista with Upgrade Edition Product Key Tidak dapat Clean Instal Windows Vista dengan Upgrade Edition Kunci Produk
- Trick to Buy and Install Full Retail Windows Vista at Upgrade Price Even Without Existing Old Windows CD Trick Membeli dan Eceran Full Instal di Windows Vista Upgrade Bahkan Tanpa Harga Lama yang ada CD Windows
- Increase and Speed Up Slow FireWire 1394 Copy and Transfer in Windows XP SP2 Meningkatkan dan Speed Up Lambat FireWire 1394 Salin dan Transfer pada Windows XP SP2
Tidak ada komentar:
Posting Komentar
Silahkan posting komentar anda